“Wet Fly 101” — an introduction to wet fly fishing for trout — first appeared in the Nov/Dec 2013 issue of American Angler. I am including the original art for the diagrams that accompanied the text, and most of the photos. Many thanks to American Angler for publishing the article, and for their continued enthusiasm about wet flies and soft-hackles.
Wet Fly 101: Take the ancient and traditional path to subsurface success
by Steve Culton
Wet flies have been fooling trout for centuries. The fish aren’t getting any smarter, a simple truth that is reinforced every time I take a trout on a soft-hackled fly. Once the king of American fly-fishing methods, the wet fly fell out of favor decades ago. But today, a growing number of anglers are discovering what a dedicated few have known for years: the best match for a hatch is often a wet fly.
The what and why of the wet fly.
Basically, wet fly fishing is an attempt to duplicate subsurface insect life. While many mayfly nymphs emerge and fly cheerfully away, many more never escape their shucks. Wings get wet. Cripples drown. Spinners that don’t get eaten eventually sink. Caddis pupae rise to the surface to emerge; many adults swim to the bottom to lay eggs. Unfortunate terrestrials fall in and become easy meals. That’s an impressive biomass.
Trout know all this, in a programmed-by-nature way. Trout need to eat to live, and they are opportunistic feeders. They see things underwater – particularly food – to which humans are oblivious. The wet fly capitalizes on these factors. As James Leisenring, one of the godfathers of American wet fly fishing, stated, all you need to do is fish your fly “so that it becomes deadly at the point where the trout is most likely to take his food…” The vast majority of the time, that’s subsurface.
The four basic wet fly styles.
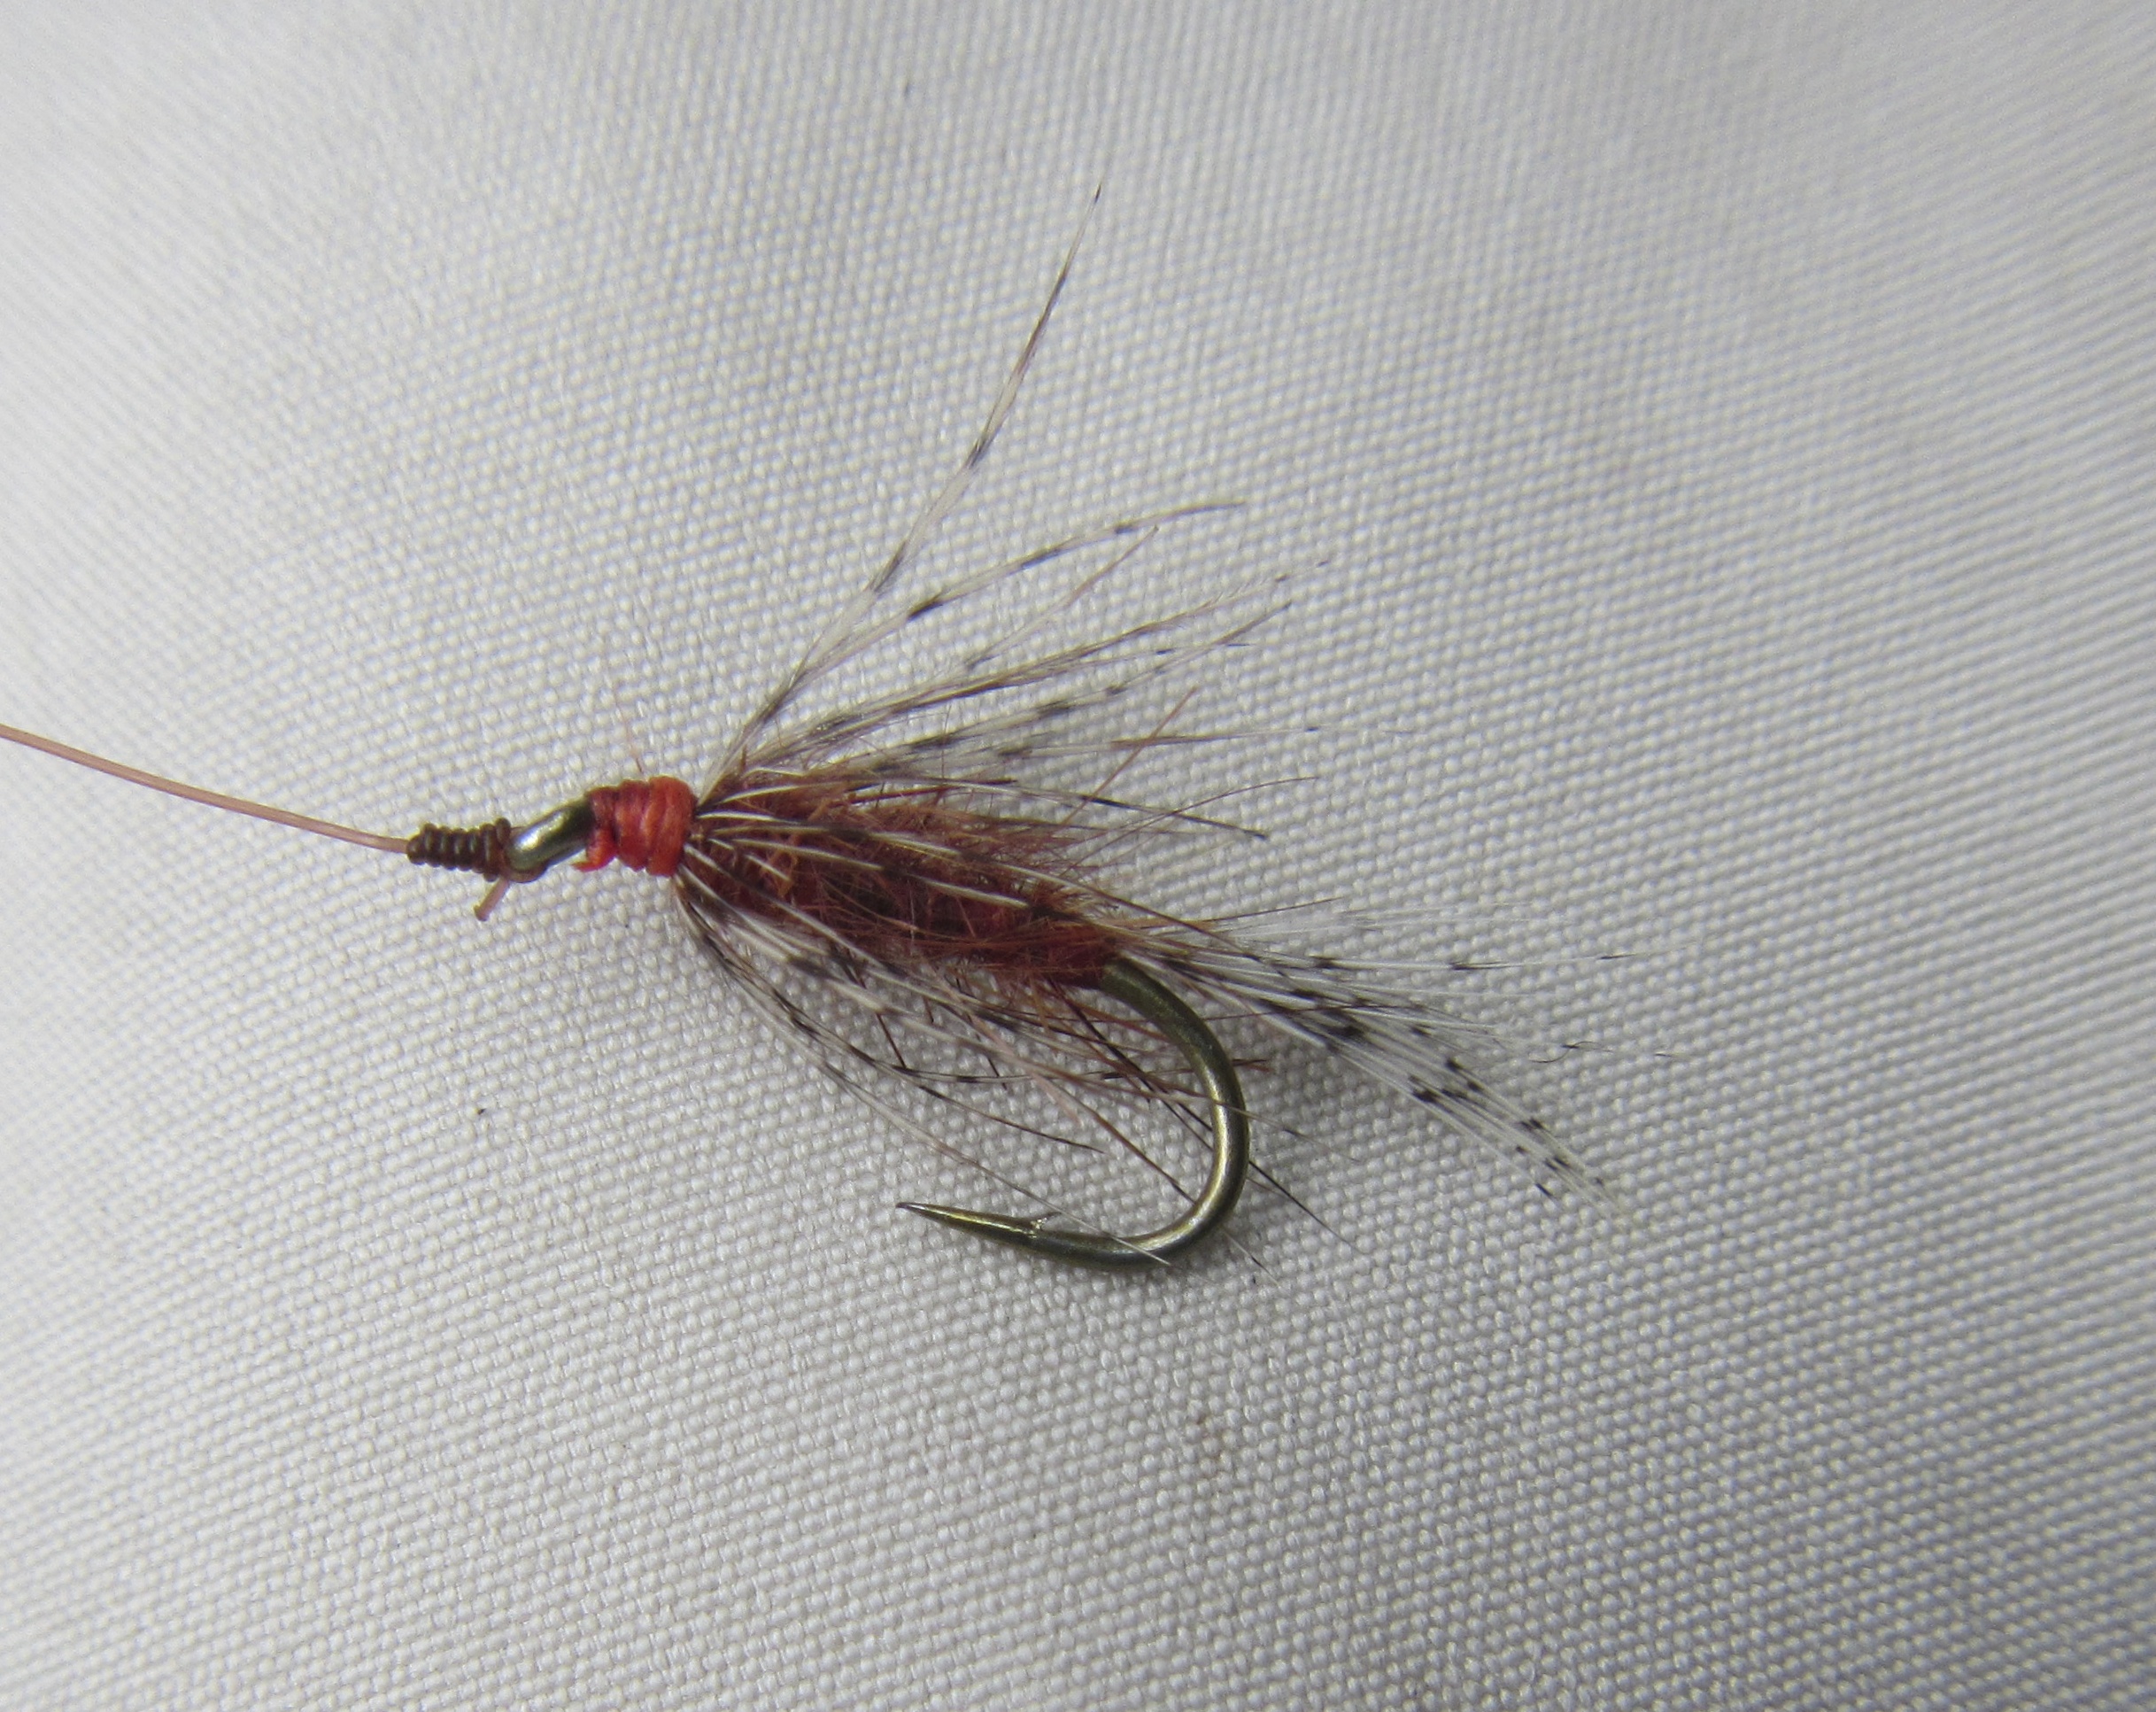
Wet flies tend to be highly impressionistic. Many look like nothing in particular, but rather a lot of things in general. In his book Wet Flies, Dave Hughes divides them into four groups: soft-hackles (or “spiders”), wingless wets (sometimes called “flymphs”), winged wets, and fuzzy nymphs. Those four are a good place to start.
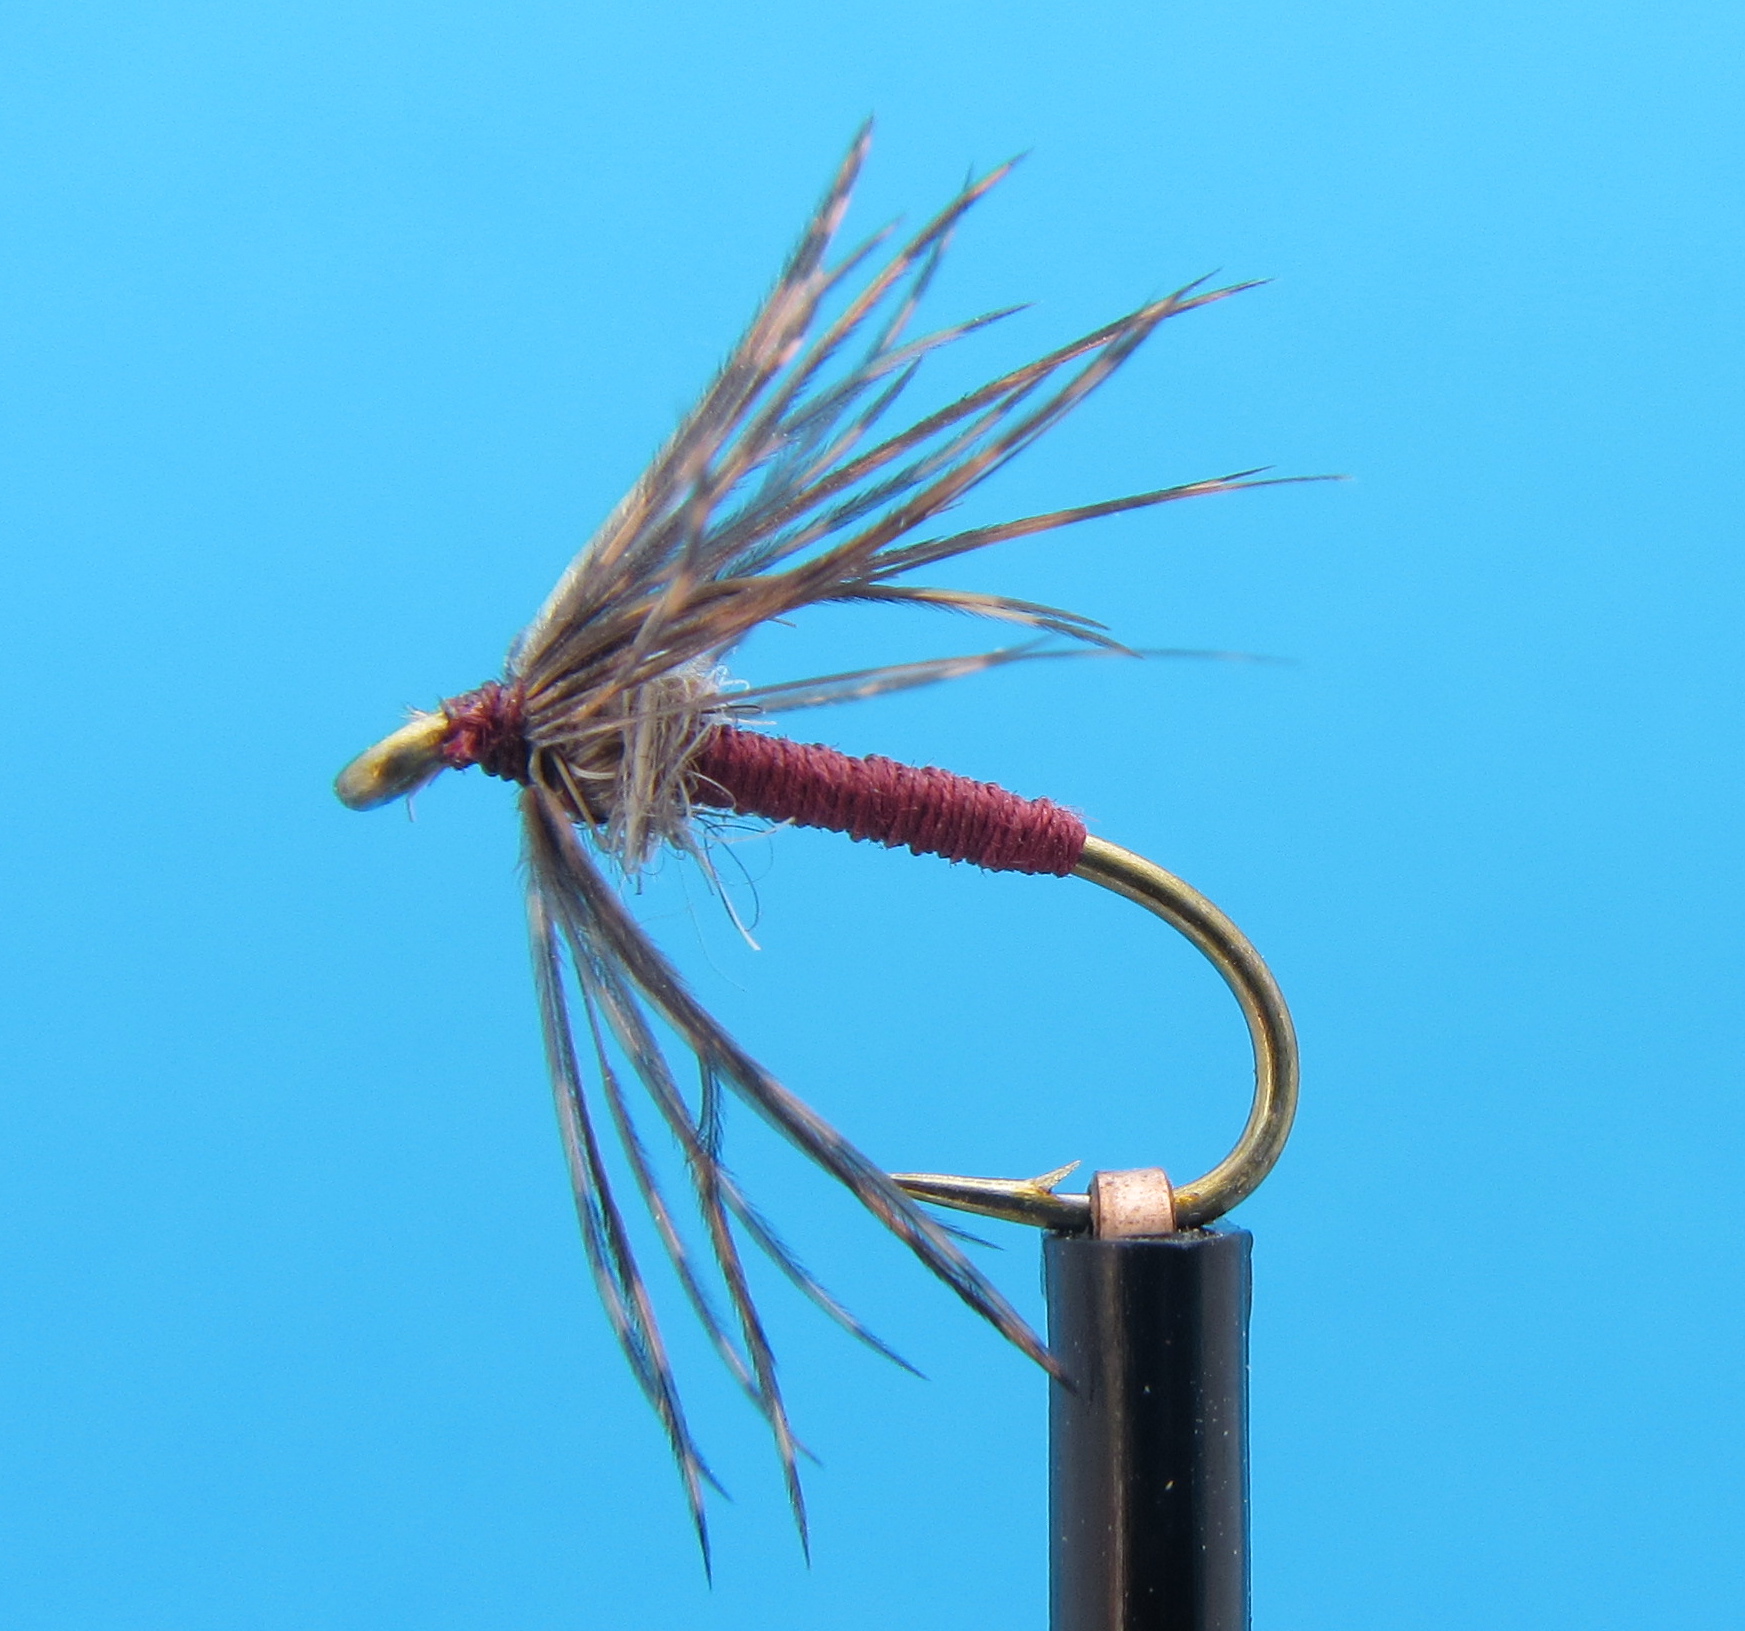
Soft-hackles are sparse creations: thin bodies with a soft-hackled feather wrapped at the head. Popular hackling choices include Hungarian partridge, grouse, hen, and starling. By varying the size of the hook and the color of the body and the hackle, you can match just about any hatch.
February Red Soft-Hackle
The outstanding feature of the wingless wet is its spikey, air bubble-trapping fur body. Hen hackle, typically 3-4 turns, surrounds the front third of the fly. Wingless wets can be fished deep or in the film like a dry.
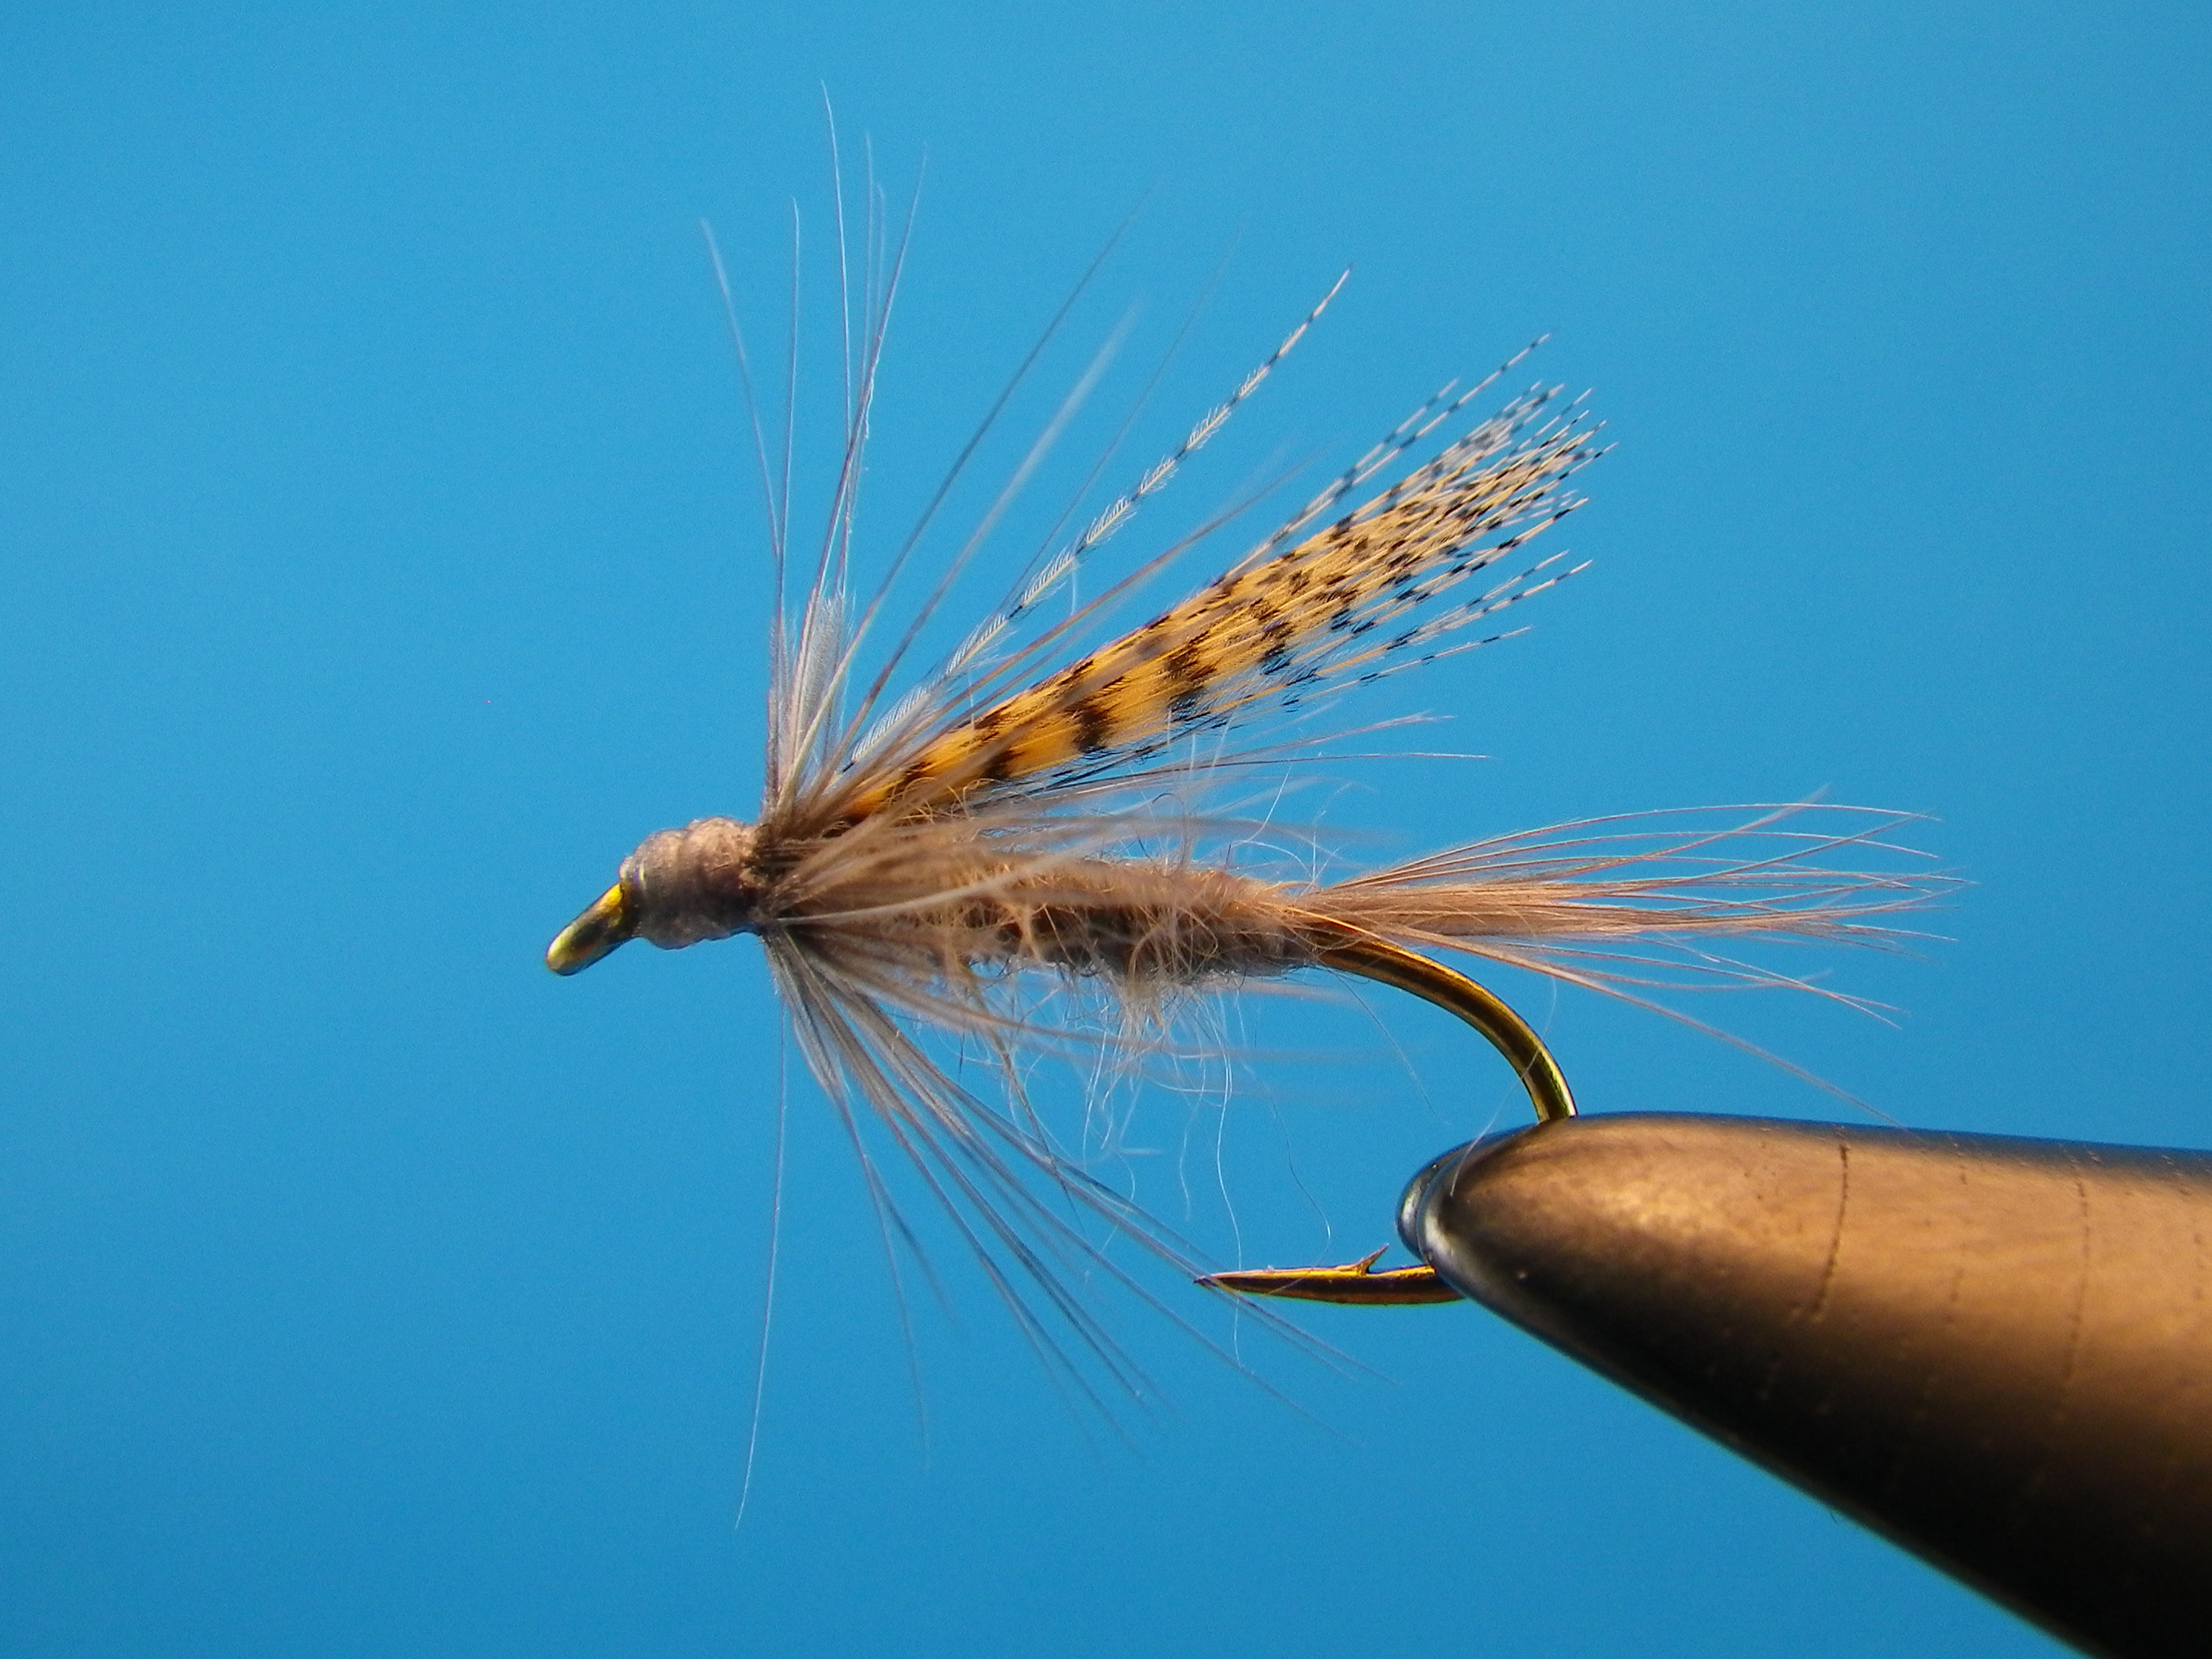
March Brown Wingless Wet

The hero of the winged wet is – drum roll – its wing. Winging material varies from natural wood duck fibers to vibrantly colored quill. Likewise, winged wets run the gamut from hatch-specific patterns like the Light Cahill to gaudy attractors like the classic Bergman-style wets.
Dark Hendrickson Winged Wet
Fuzzy nymphs are buggy creations that bridge the gap between a nymph and an emerger (think Hare’s Ear meets The Usual). They are often underweighted with wire that is smaller than the diameter of the hook wire. Fuzzy nymphs cover much of the water column; they work whether you’re dead drifting them near the bottom or letting them swing up near the surface.
Ginger Caddis Fuzzy Nymph

While each of the four styles is unique, they all share a common trait: they look – and behave – differently when submerged than they do dry. Sylvester Nemes, another giant of the wet fly, wrote, “Any sunk artificial fly, to be good, must transform itself in the water into something alive, something suggestive and moving, something that looks good to eat.” Wet flies excel at that task.
In the tradition: a team of three wets.
The classic method involves using more than one fly. Back in the day, anglers would sometimes fish a half-dozen or more flies. For our purposes, three will do: a top dropper, a middle dropper, and the point fly. The flies are not connected to each other by their hook bends; rather, they swim freely on short tags. Multiple flies intimidate many people, but the advantages far outweigh the specter of tangle perdition.
Obviously, three flies give you more opportunities per cast to hook up. But the biggest reason it tips the odds in your favor is that it gives the trout a choice. Different sizes. Different colors. Different species. Different life stages. Different depths. Droppers are the quickest way to find out what the fish want. They won’t be bashful about letting you know. You’ll have days where the trout will choose one fly at the ruthless exclusion of all others. When you’re not sure what will be hatching, you can hedge your bets by covering three possibilities. Certain of what’s in the water? Try three life stages, like a fuzzy nymph, an emerger, and something spinner-like.
Beyond probability and biology, fishing a team of wets imparts a sense of wonder. Hooking a trout is like opening a present: you don’t know which fly the fish has taken until you get it in close. What’s more, wet fly fishing connects you with the traditions of our sport. It is poetic to catch a trout on a fly pattern that is hundreds of years old.
How to build a three-fly wet fly team. At first glance, building a multi-fly dropper rig looks complicated. But basically, you’re just tying three triple surgeon’s knots. You’ll need a 9-foot, 3x or 4x tapered leader for the butt section, and some 4 or 6-pound Maxima (I prefer Chameleon [AUTHOR’S NOTE: I used UltraGreen four-pound in 2014 and it worked just as well as Chameleon]) for the droppers. I’ve tried a lot of different leader materials, and Maxima is by far the best because of its stiffness. I use the 4-pound in lower, clearer flows.
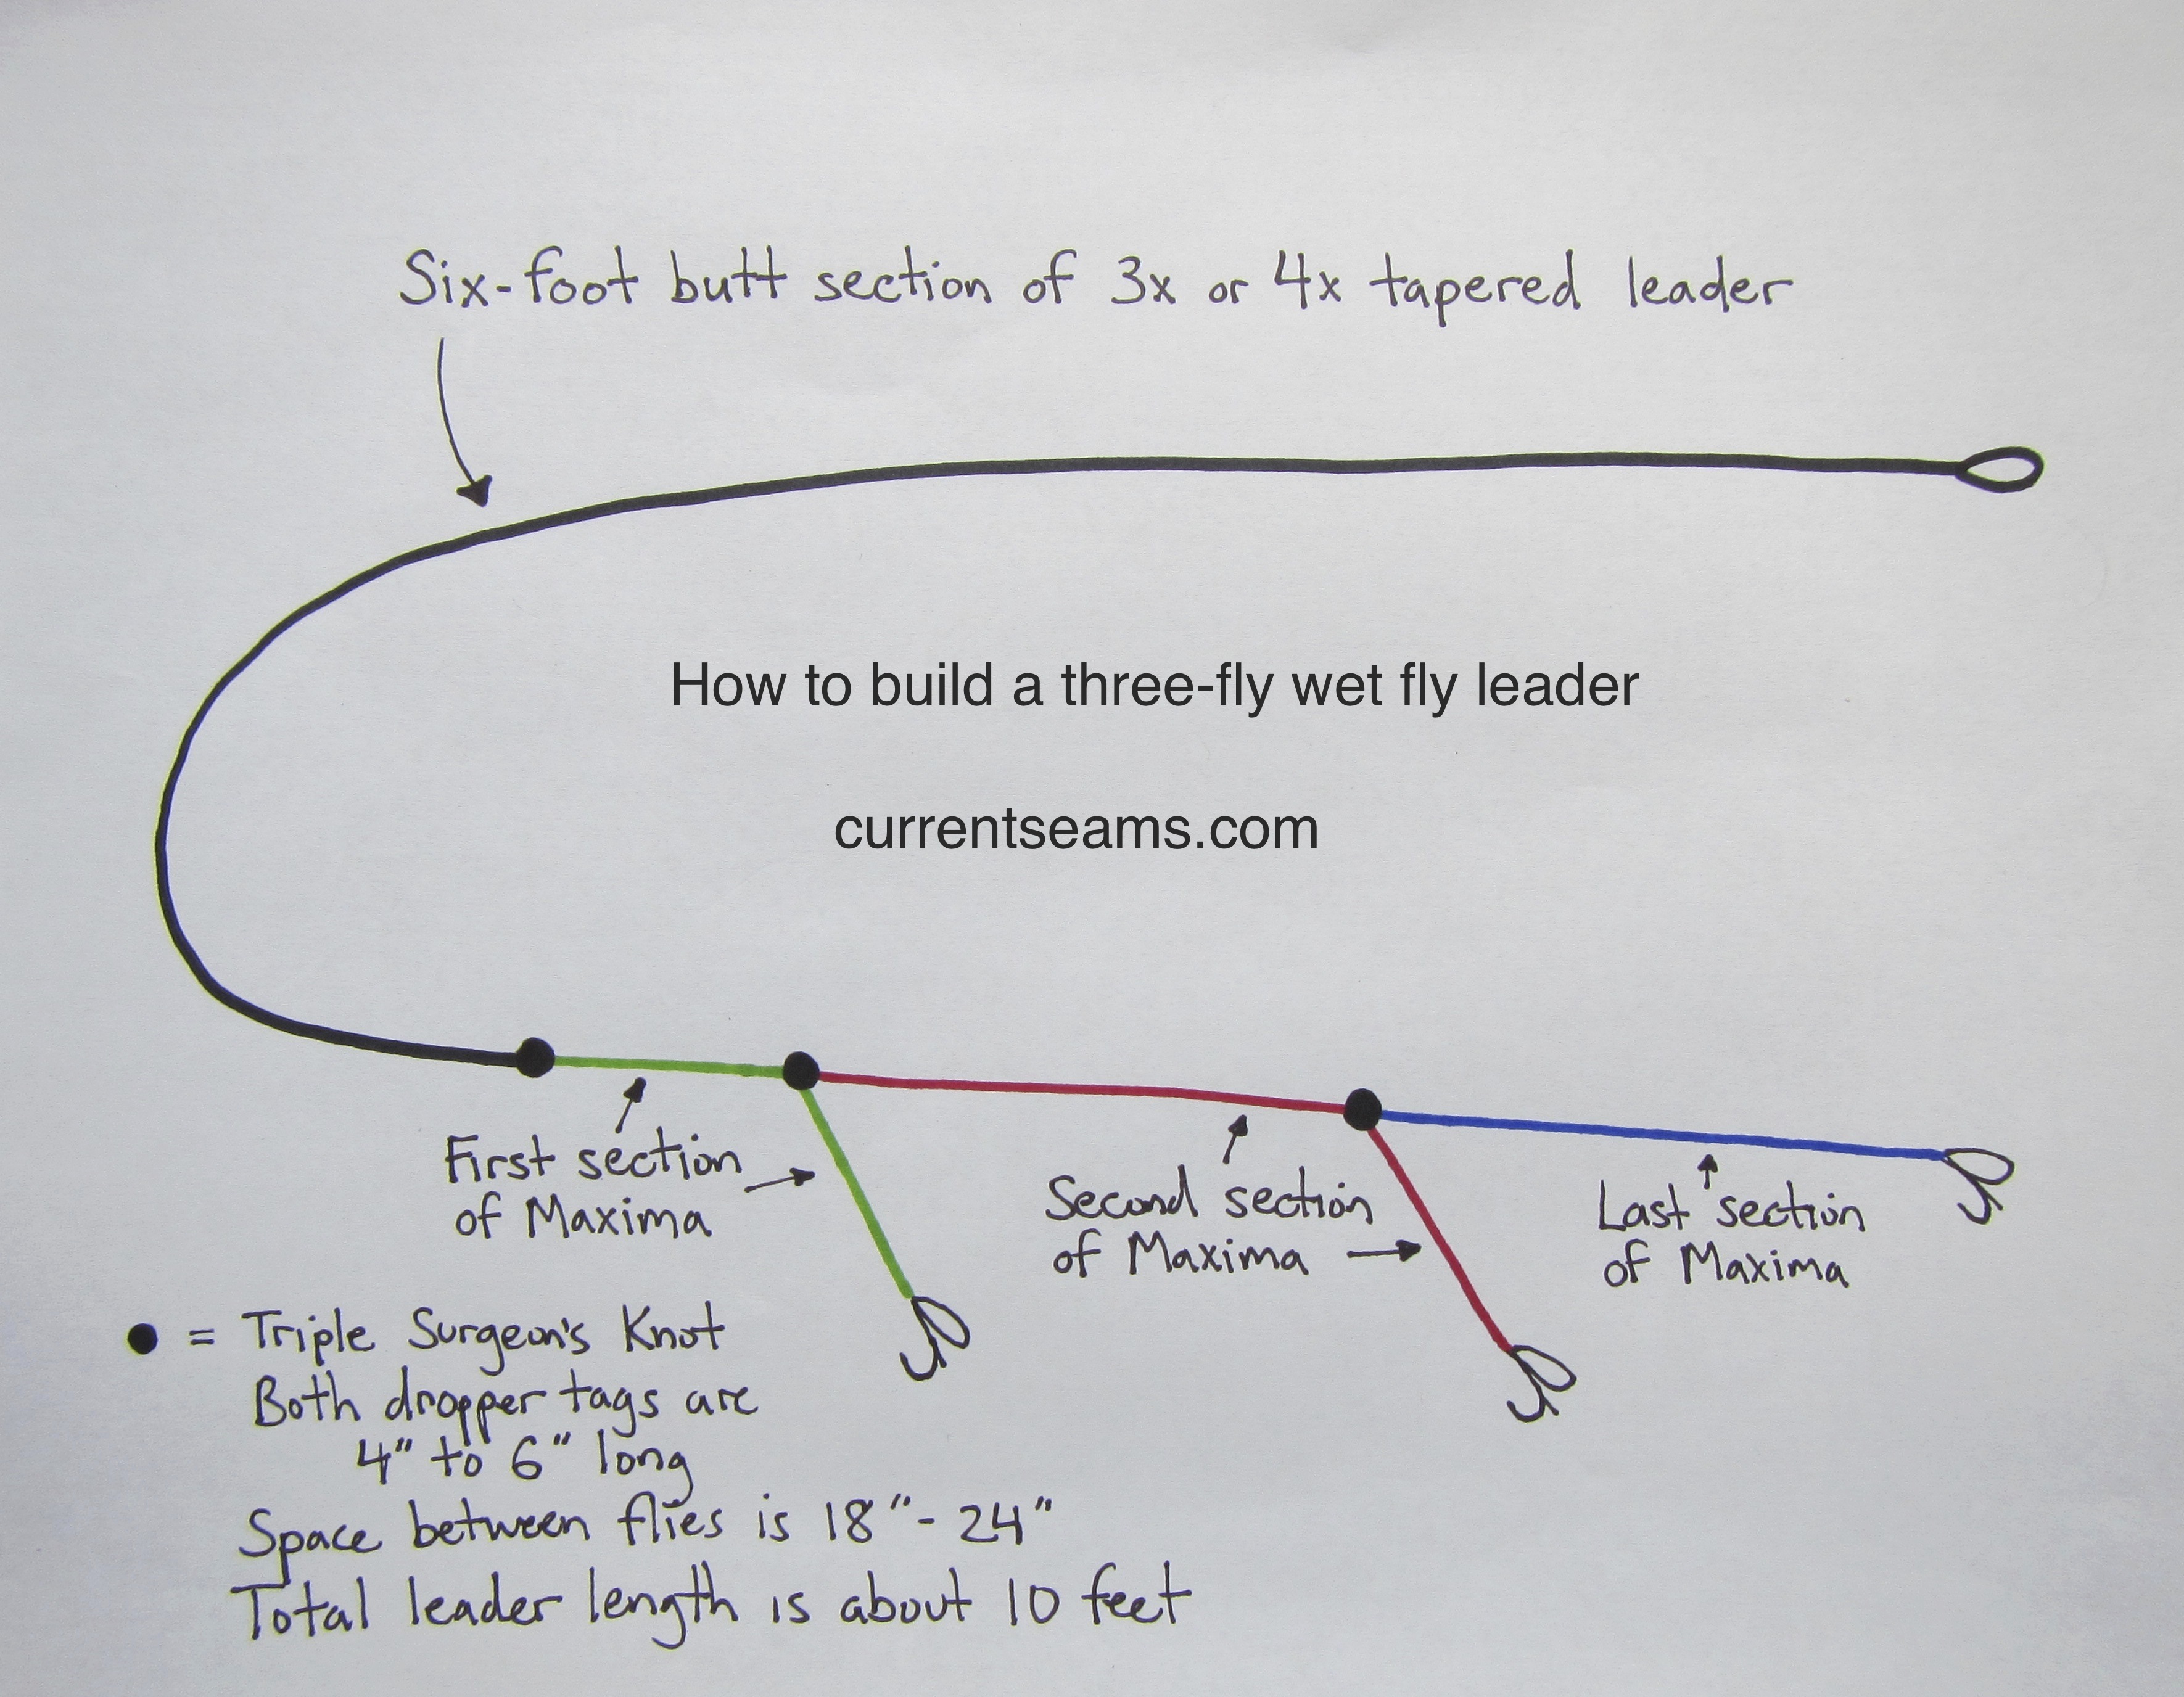
Step 1: Cut off the bottom three feet of the tapered leader. Discard this bottom section.
Step 2: Knots are not worthy of your trust. Wet every knot before you pull it tight, and test every knot by giving it a good tug. The heat of battle with a trophy trout is a bad time to discover you tied a substandard knot.
Step 3: Tie just over a foot of Maxima to the tapered leader with a triple surgeon’s knot. The bottom of this section will form the first dropper. Trim both tag ends.
Step 4: The ideal length between wet flies is somewhere between 18 and 24 inches; I prefer my dropper tags between 4 and 6 inches. If you’re going to build a dropper rig with the flies 24 inches apart and the tags 6 inches long, you’ll need a 30-inch section (24 + 6 = 30) of Maxima for the next step.
Step 5: Take the first, shorter section of Maxima (the one you tied to the tapered leader) and hold it 6 inches from the end. This will be your first dropper. Join the 30-inch section to the shorter section at this point with a triple surgeon’s knot.
Step 6: Trim the excess of the second section above the knot (the part you trim is on the butt side of the leader). You should now have a dropper tag about 6 inches long, pointing away from the butt, and about 30 inches of Maxima below it.
Step 7: You’re in the home stretch. This is basically a repeat of step 5. Grab the second section of Maxima 6 inches from the end, and join another 30-inch section of Maxima to it with a triple surgeon’s knot. As with Step 6, trim the excess above the knot.
Step 8: You should now have a rig that looks like the one the diagram: two shorter tags, to which you’ll tie dropper flies, and a longer end section, to which you will tie the point fly.
Which fly goes where?
There are many theories on what works best; I’m just going to give you my take on positioning. The largest or heaviest fly goes on point. It makes your team of wets easier to cast, and it gives you the option of using an underweighted or bead head wet that suggests a nymph. On a dead drift presentation, the point fly will be the deepest fly. Point position is also where I’ll place an attractor fly, like an Alexandra or a Woolly Worm.
The top dropper is almost always a soft-hackle or other emerger-like fly. This fly will always be closest to the surface. It’s rarely a bad choice to make your top dropper the size and color of what’s hatching.
The middle fly is a bit of a wild card. I want it to be something that’s likely to be in the water – for example, in the summer, a Drowned Ant. If I have a caddis pupa on point and a caddis emerger on top, I might mix things up and put a soft-hackled Pheasant Tail in the middle (give the trout a choice). Most of all, I want it to be a fly in which I have complete confidence. With a little experimentation, you’ll soon find what works best for you.
Learn to recognize classic wet fly water.
If you enjoy solitude, you’re going to love wet fly fishing. The water you’re targeting will be sections of river that most anglers ignore. The Hendrickson hatch is a crowd magnet on my home water, the Farmington River. But I usually have my pick of spots because everyone else is jockeying for a place in the named pools. Ignore water with mirror-like surfaces and languid flows. Rather, fish your wets in the transition water above them. Look for what I call the snotty water: pockets, riffles knee-high or deeper, and runs with a broken surface – any water moving at a brisk walking pace. Look for bottom structure. Look for current seams around rocks and logjams. With wet flies, where you fish is often as important as how you fish.
Don’t be afraid to move around. One of the biggest mistakes I see beginning wet fly anglers make is flogging the same water over and over without a strike (remember Einstein’s definition of insanity?). Unless trout are visibly feeding, or I know for certain they might become active at any moment, I won’t give a spot more than a dozen casts. Sometimes taking a few steps up or downstream makes the difference. While it is true that you can sometimes goad a trout into striking, your primary quarry is the aggressive fish. You’ll be surprised how many trout will offer at your first cast.
But there are other reasons to actively wade and fish. When you walk the length of a run, you get to know it on a more intimate level. Where are the submerged pockets? Where is the sunken debris? What is the structure like behind that boulder? It is intel like this that will make you a better angler.
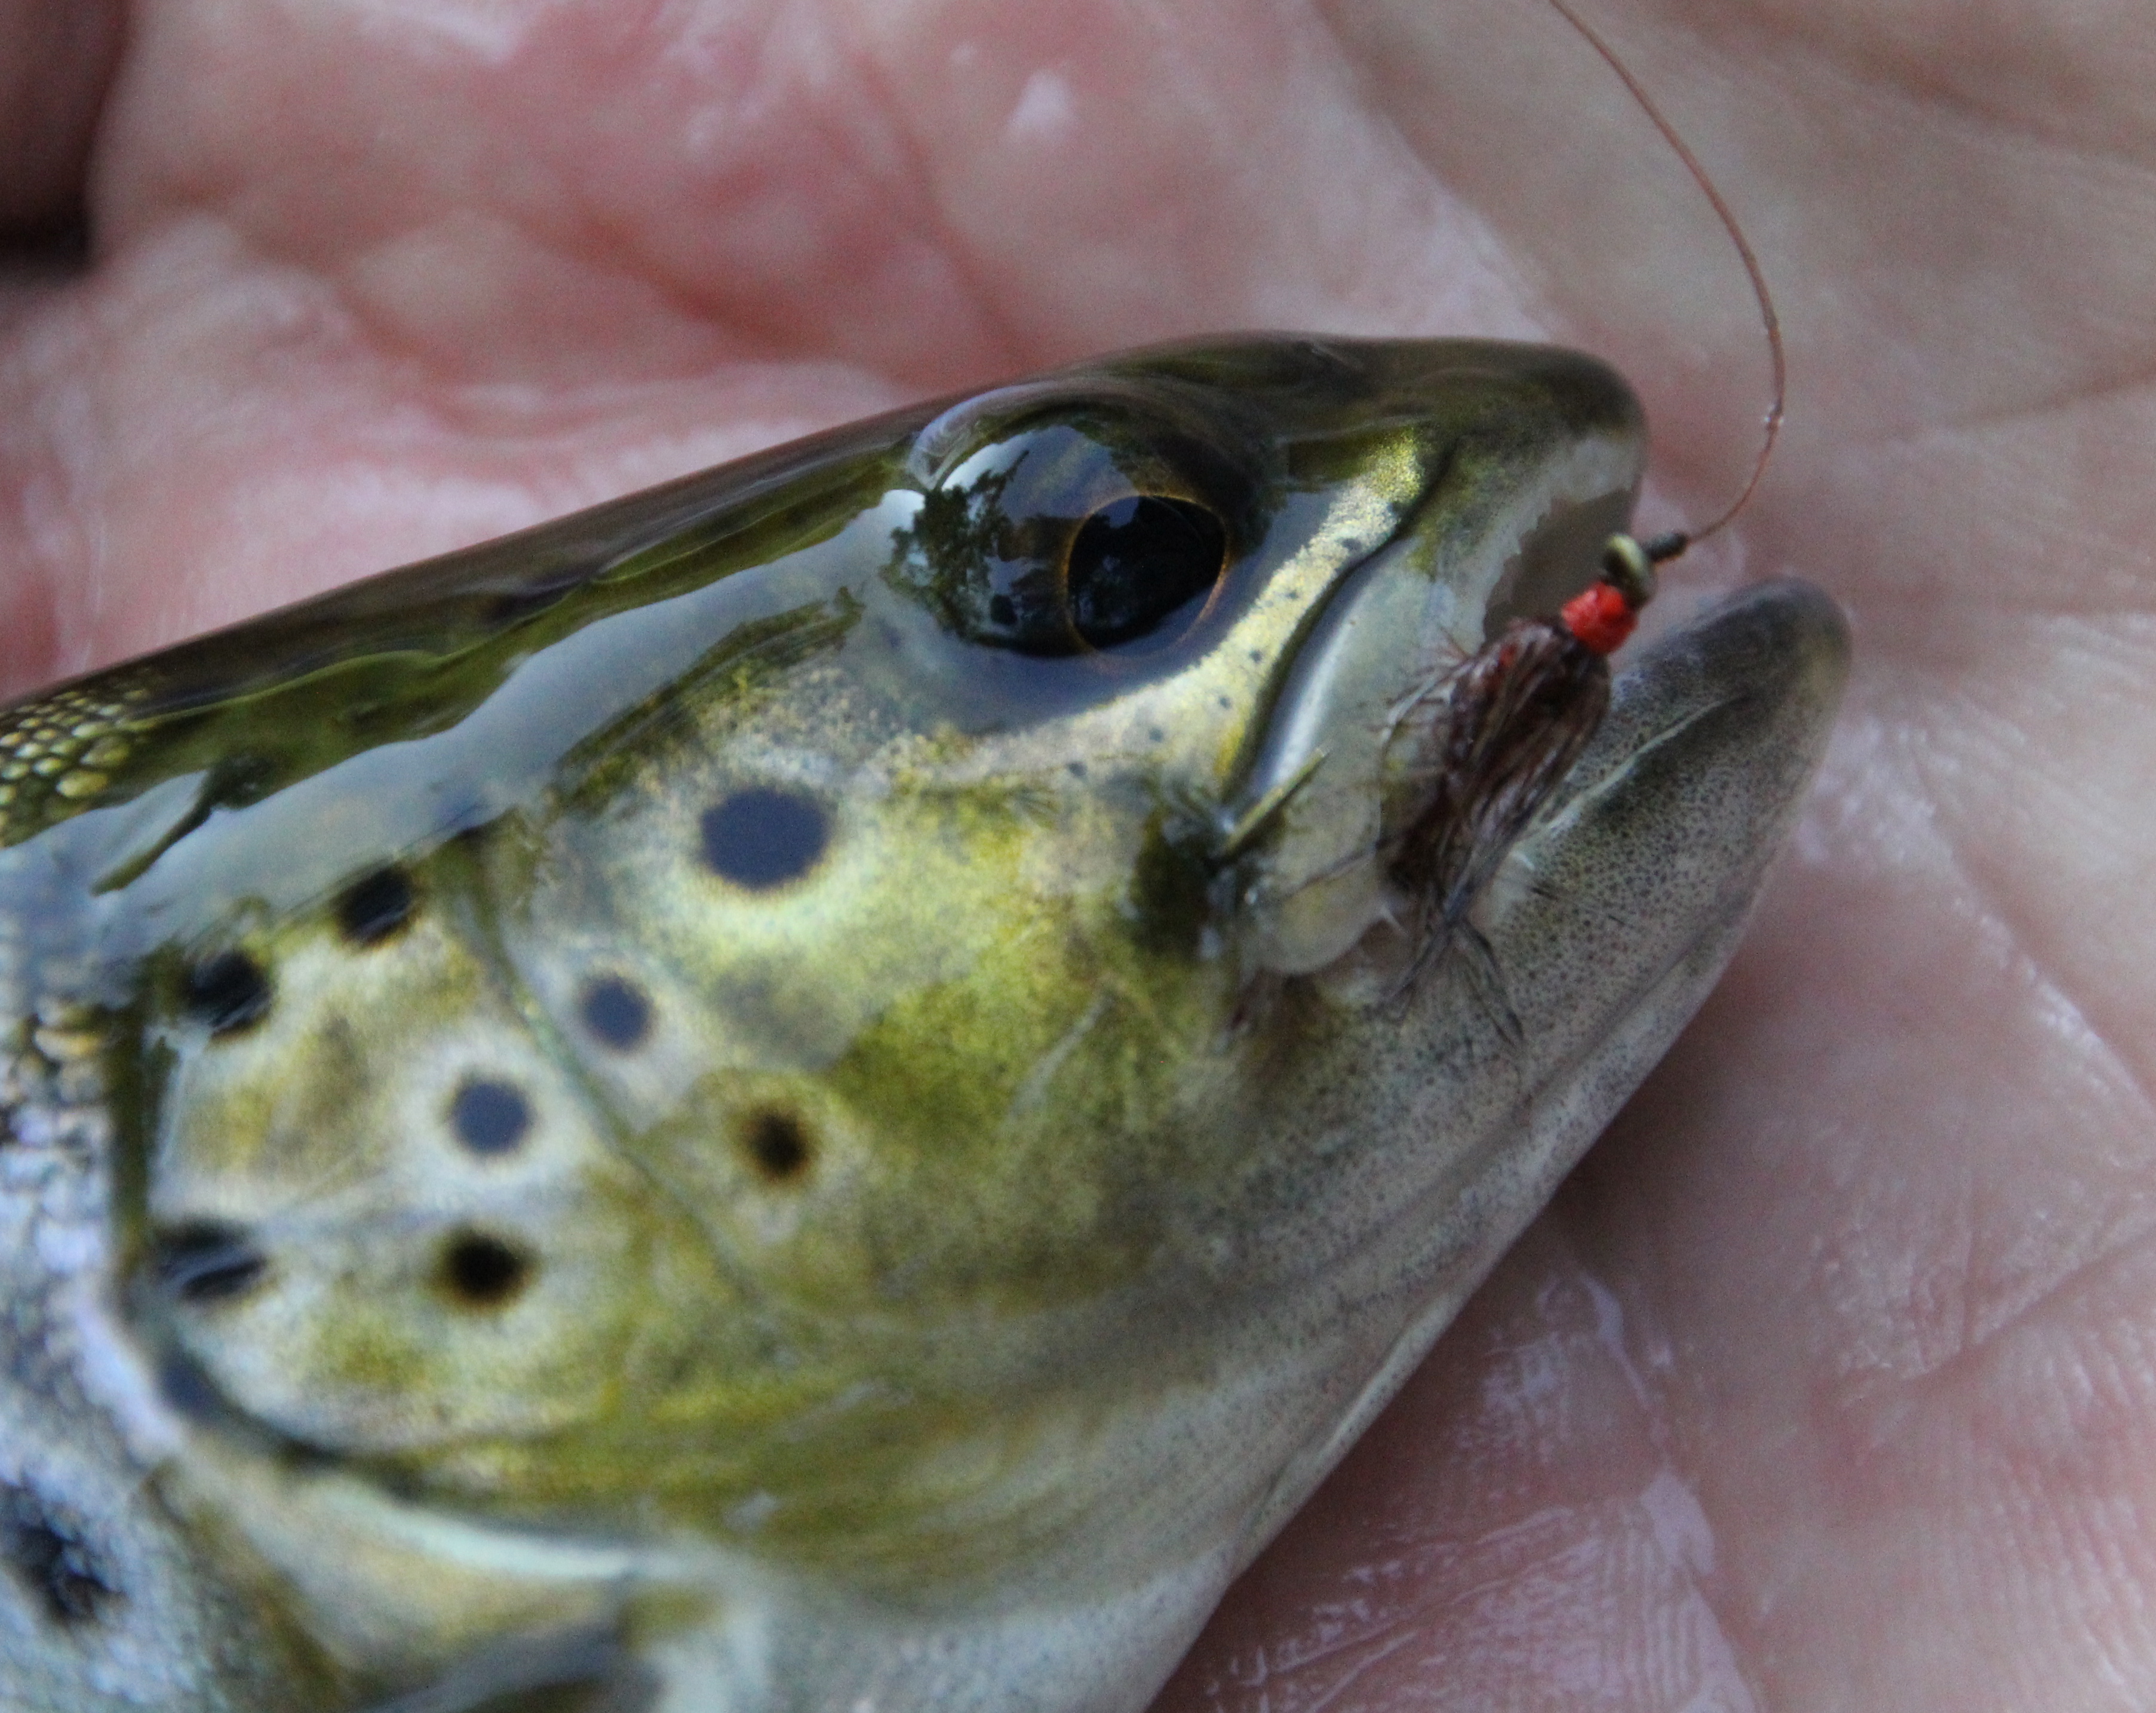
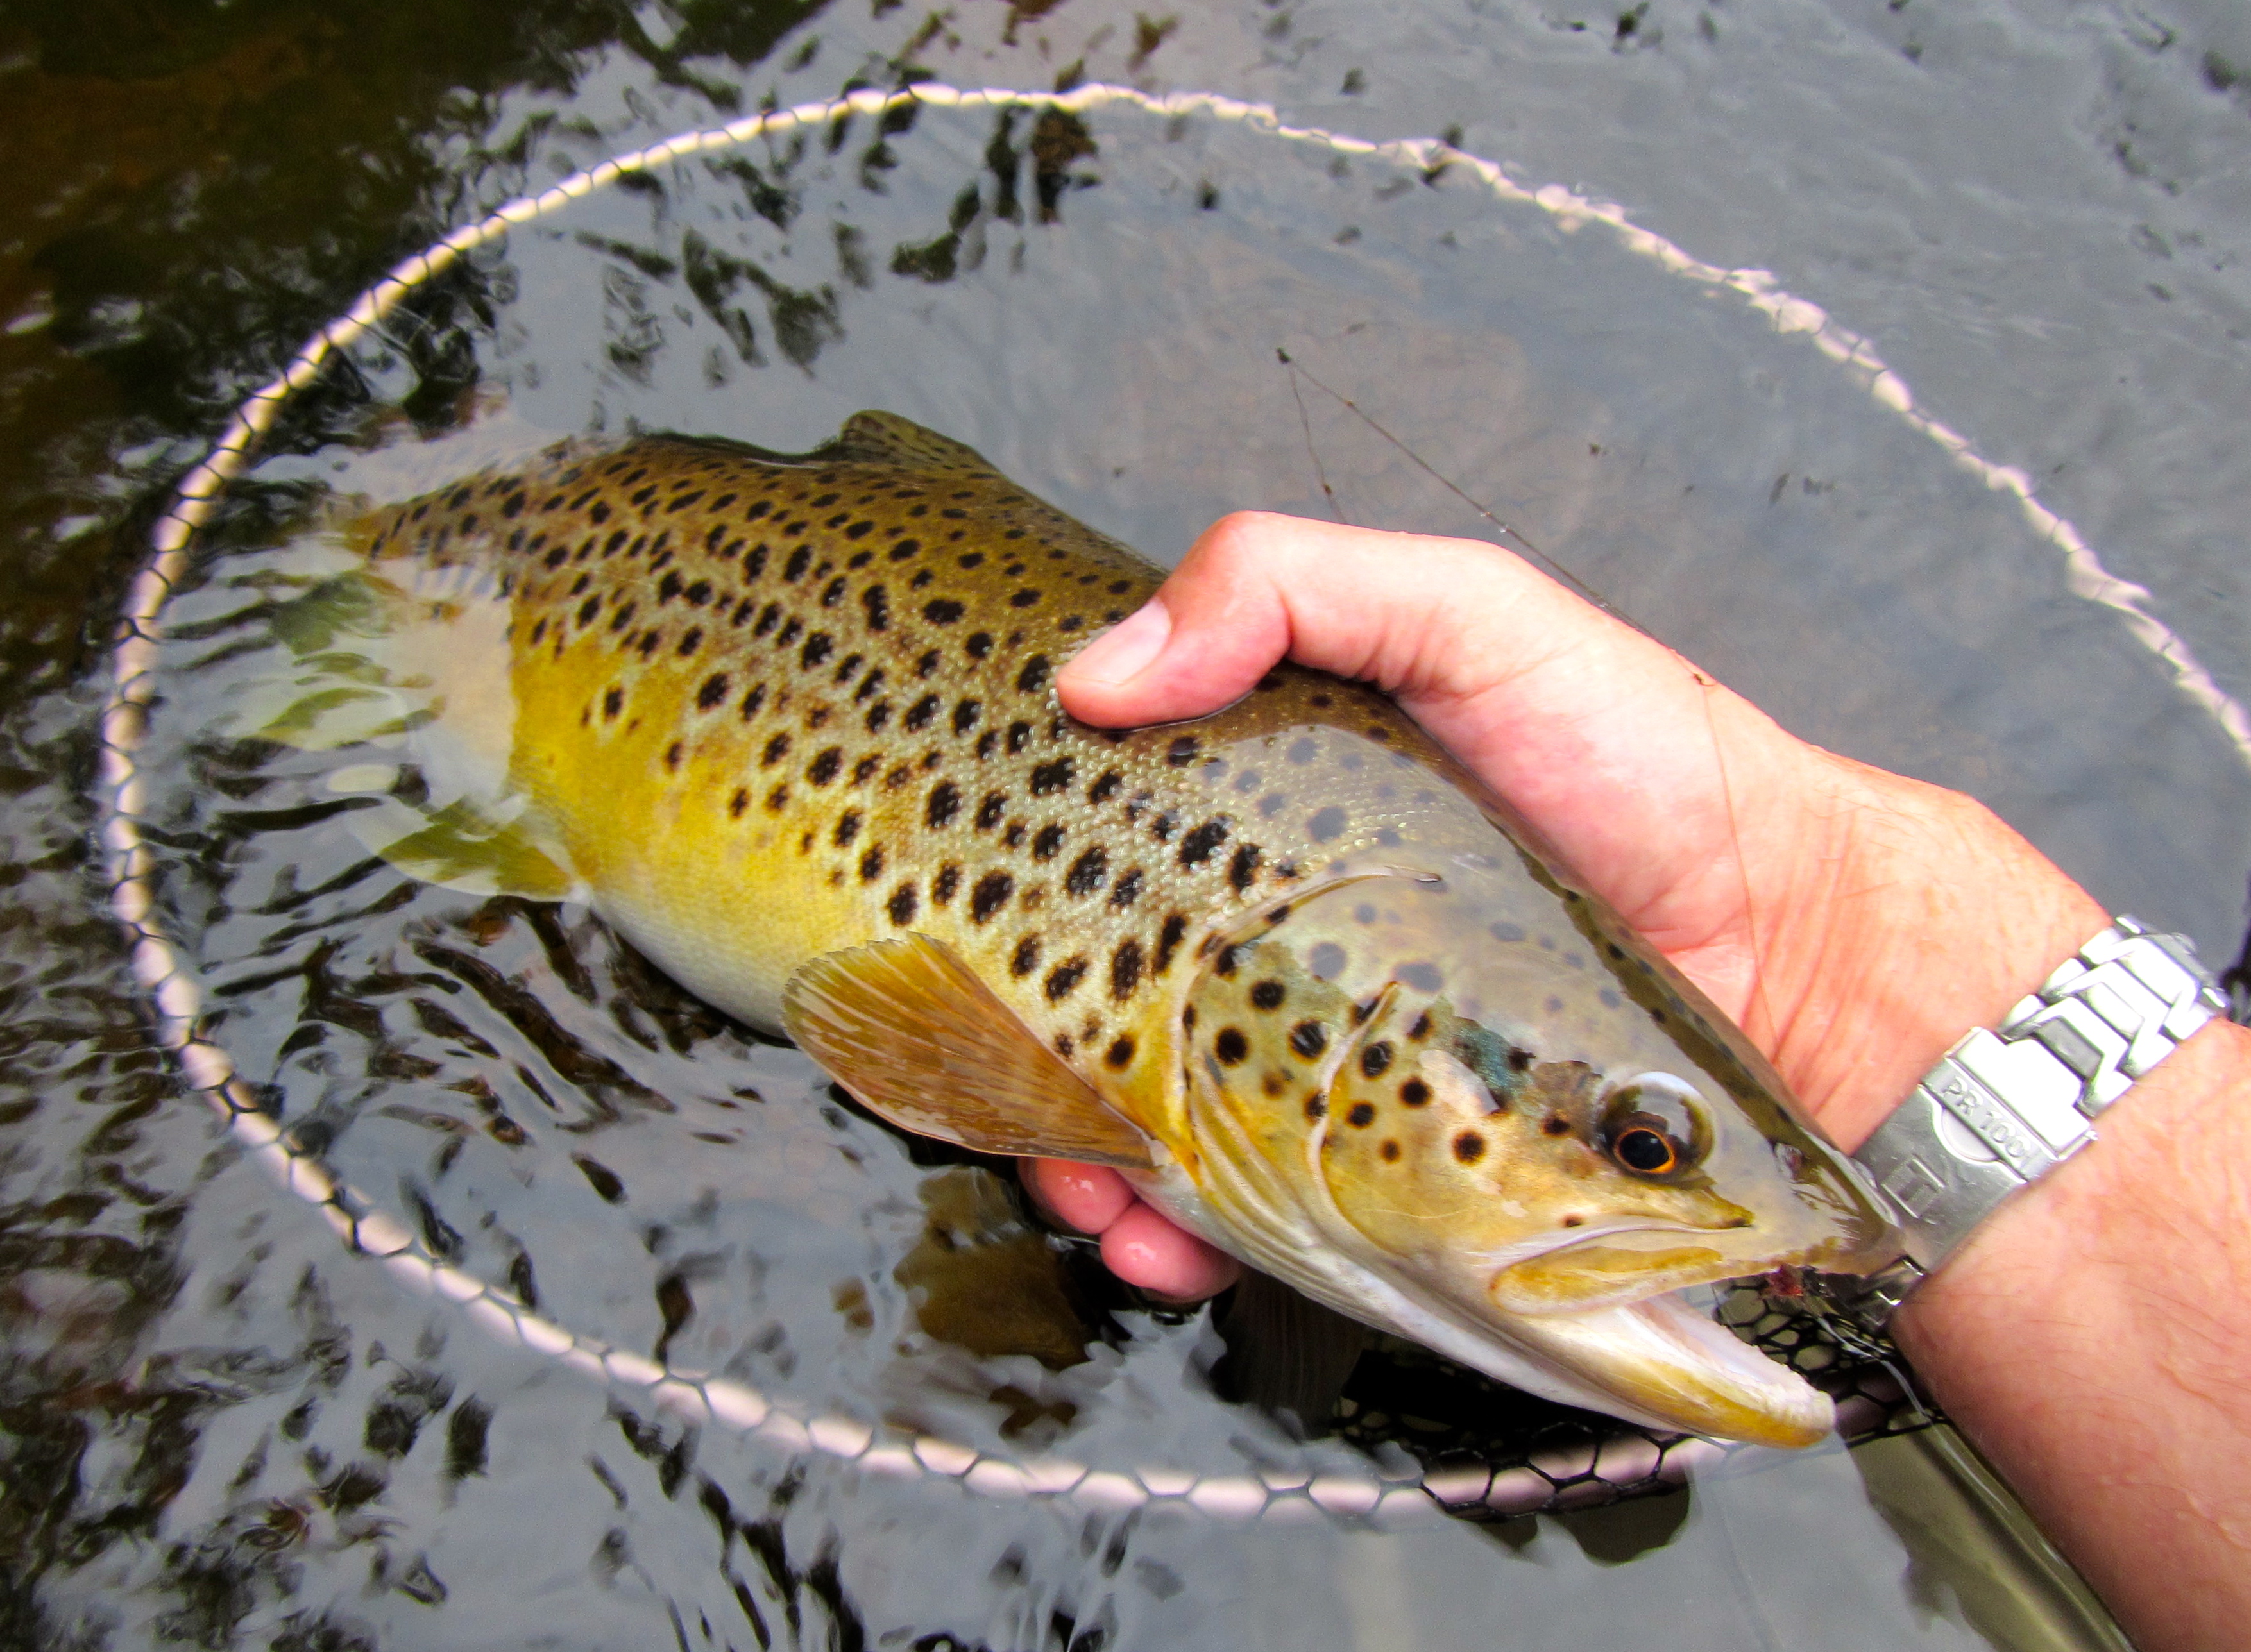
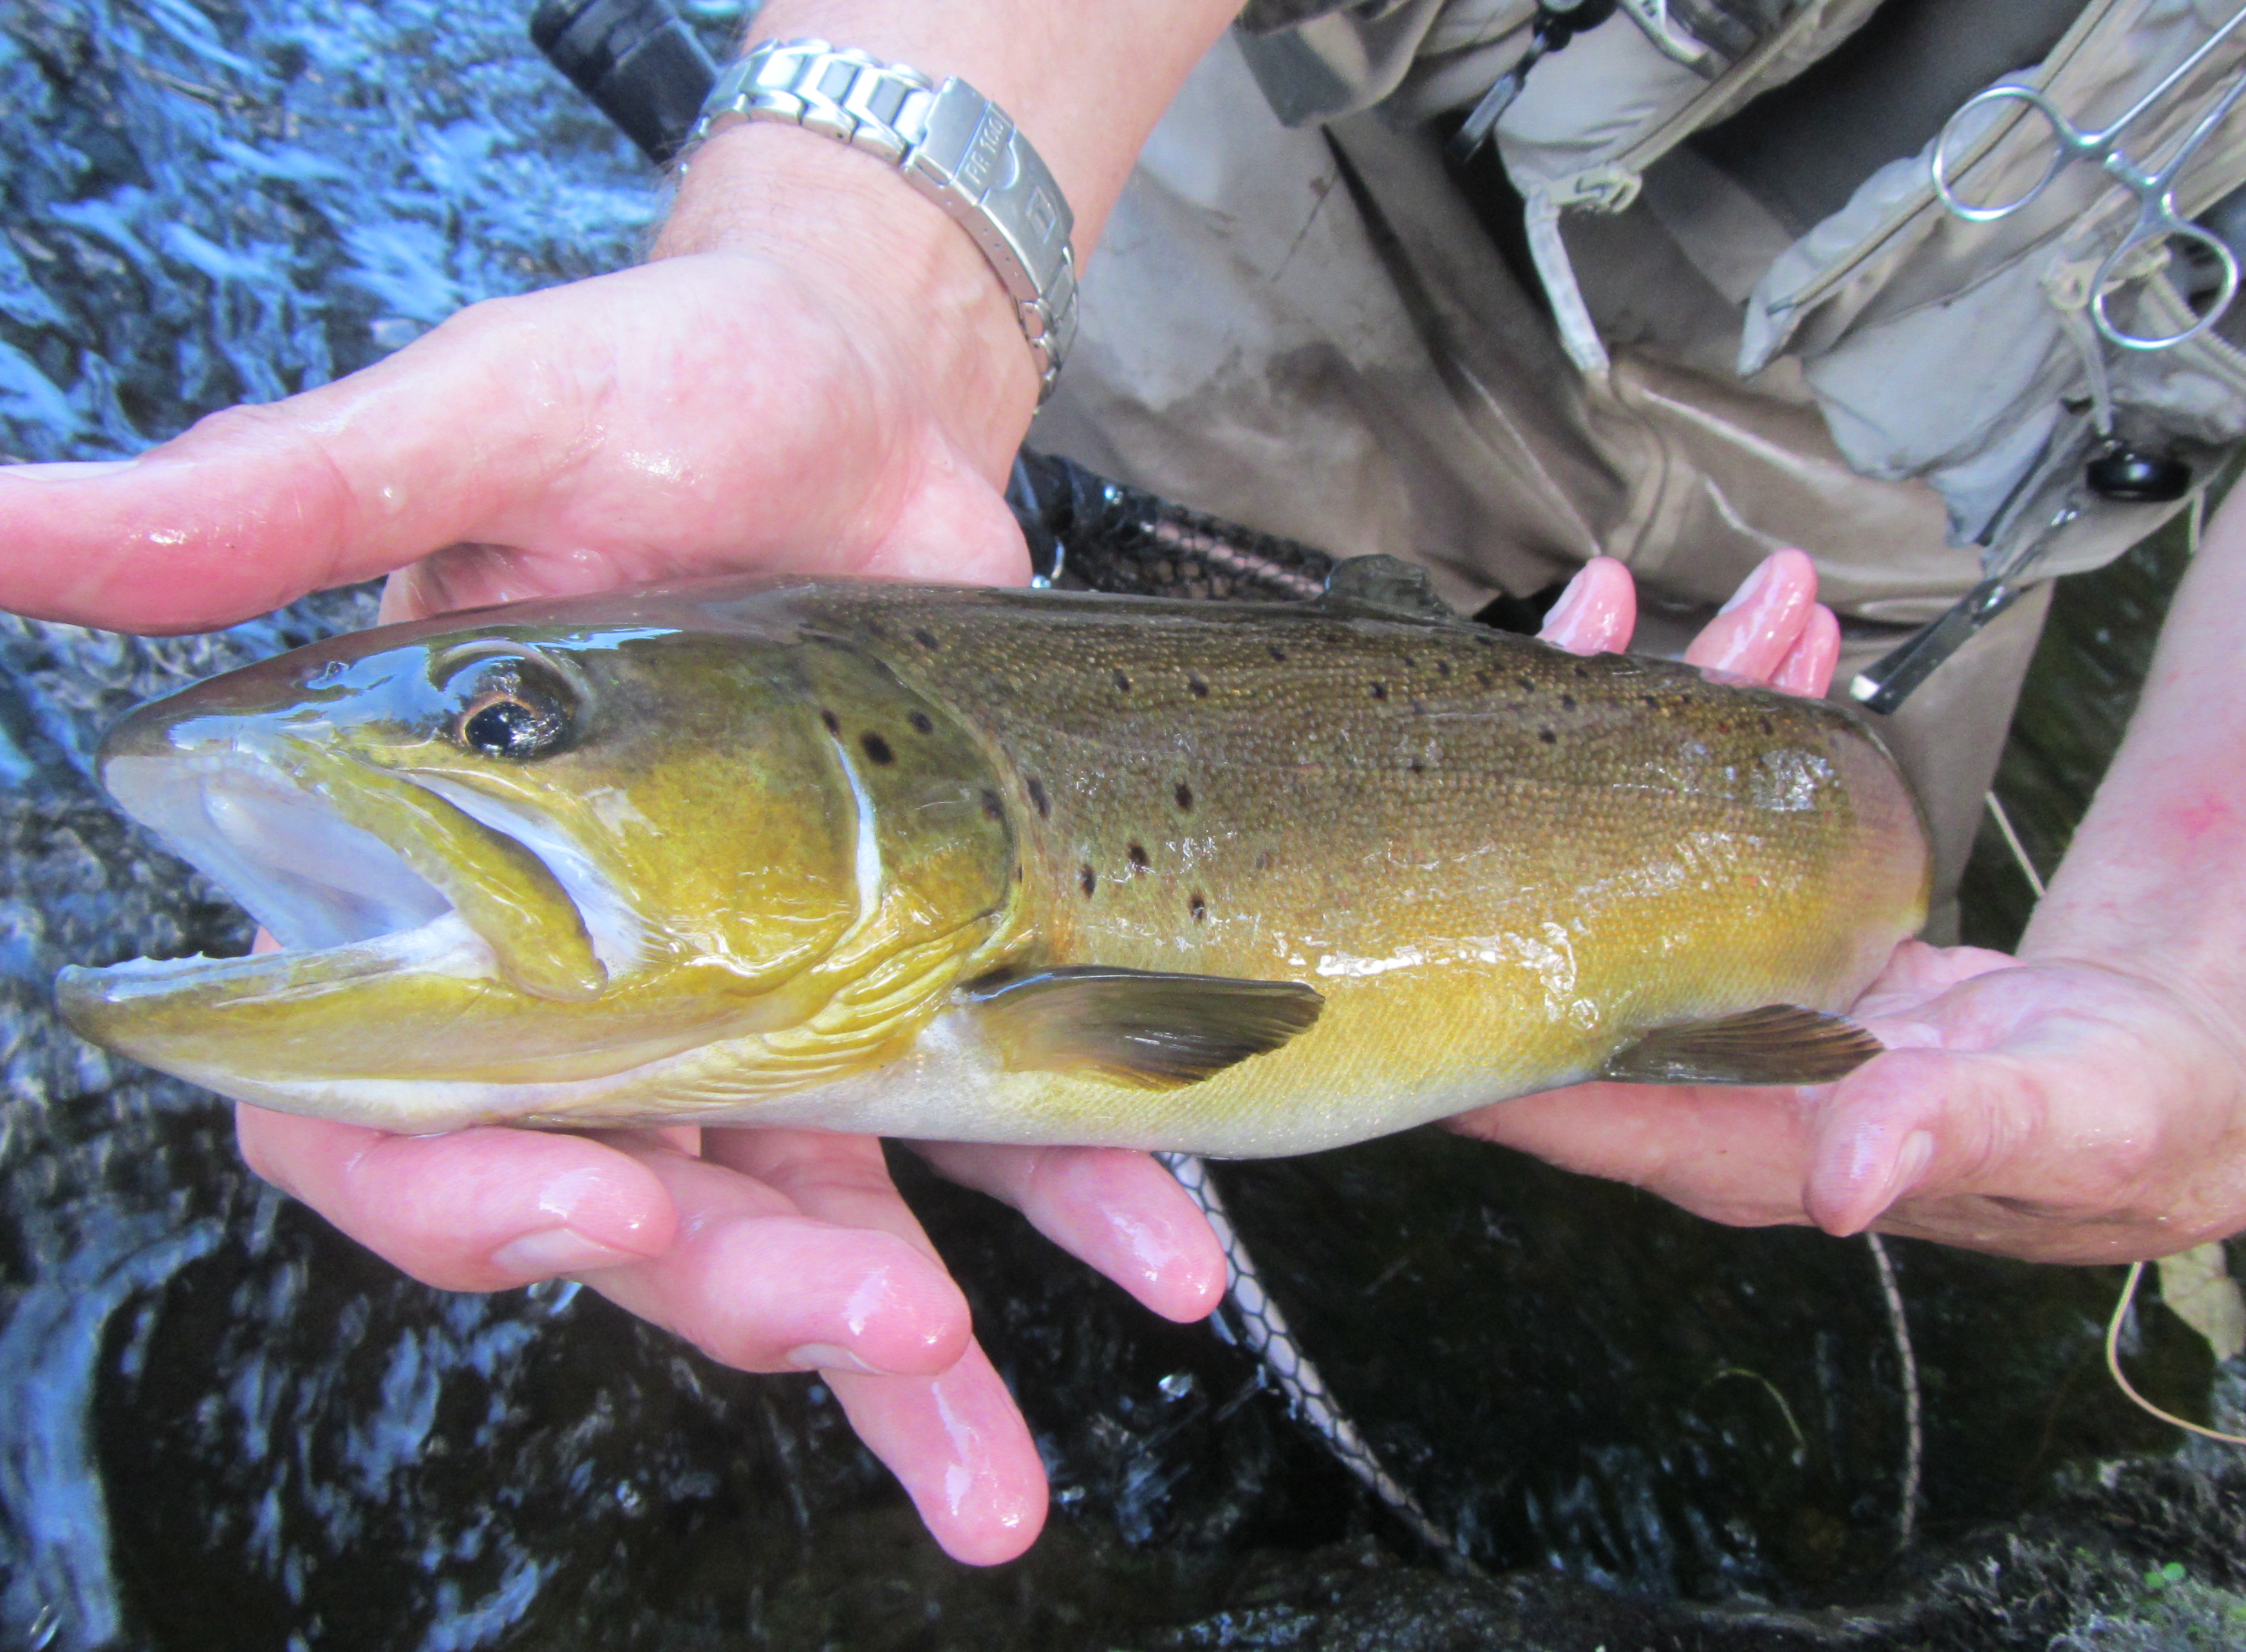
A 20-inch brown that liked the looks of a Hackled March Brown, an old English pattern.

Basic wet fly presentations.
You can make wet fly fishing as complicated or easy as you like. Since this is Wet Fly 101, we’ll stick to three presentations. Use a floating line you can mend (a longer rod makes that easier, too). I find fast-action rod blanks contrary to the true nature of the wet fly. Think of the slower bamboo rods of days long past. Two things to avoid: high line speed/ultra-tight loops, and dumpy, pile-like casts. Both are recipes for tangles.
By all means, seek out and target rising trout. It’s almost never a bad idea to drift a wet fly past the nose of an actively feeding fish. Look for splashy rise forms where you don’t see the trout’s head. More often than not, they’re taking emergers just below the surface. Match the hatch, present your wets like the naturals, and the trout will make you look like a savant.
The Upstream Dead Drift. This presentation gives you the advantage of the fish not being able to see you, and the flies being delivered to them in a natural manner. The key is line management. Immediately after making your cast, your line will form slack loops in the uneven current as it floats downstream. Gather in this slack as it forms. Take care not to strip the line faster than the current – this is a dead drift. Watch the tip of your fly line like a hawk. If it stalls, you’ve got a customer. Set the hook.
Short-Line Deep. Another upstream presentation, much like short-line nymphing, that is ideal for presenting flies in deeper holding water. Again, you have the advantage of being out of the trout’s line of sight. This is where a longer rod shines. I have a rod’s length or less line out when I present this way. Make an upstream cast, and immediately raise your rod tip to ensure the fly line is off the water. Match the track of the flies with your rod as they drift downstream. You’ll know when you have a fish – your leader will come tight and thrum with energy. Set the hook. If the water is particularly fast or deep, I’ll sometimes fix a BB shot to the leader just above the knot that forms the middle dropper. While untraditional, I assure you the trout don’t care.
Downstream Mended Swing and Dangle. Plenty of days, I’m feeling lazy. I’m content to walk a stretch of river, cast, throw a few mends, then let the currents take my flies where they will. It is a peaceful, organic, relaxing way to fish. It also works like the dickens. Make a quartering cast downstream. Throw a series of upstream mends to slow the swing of your fly. Absent a strike, let the flies swing down below you. Let them dangle in the current. Your soft hackles and spikey bodies will move even while at rest, tantalizing trout. Because your flies will have planed up near the surface, you may see a strike before you feel it. Don’t set the hook! The biggest mistake beginners make while fishing on the swing or the dangle is striking too soon. They take the fly right out of the fish’s mouth. When you see the swirl of the take or feel the tug, wait a moment. Ask yourself, “Are you still there?” Then, lift your rod tip, and the trout will be, having neatly hooked itself in the corner of its mouth.
A Simple Mended Swing: This basic wet fly presentation is an ideal way to cover water and find aggressive fish. Make a quartering downstream cast (A). Throw a series of upstream mends to slow the speed of the flies as they swing down and across (B). At the end of the drift, leave the flies suspended in the current (C). This is called the dangle. Be ready for explosive strikes.

For those interested in an advanced degree in wet fly, I recommend Dave Hughes’ Wet Flies and Sylvester Nemes’ The Soft-Hackled Fly. But for now, class is dismissed. Head for your favorite stream. And catch some trout the way your great-great-great-grandfather did.